| Sanford | |
|---|---|
| |
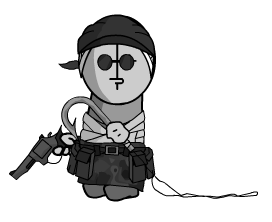
| Sanford, as he appears in Madness Combat 9. | |
| Debut: | Madness Combat 5: Depredation |
| Appearances: | 12 (3 non-canon) |
| Role(s): | Protagonist |
| Kills: | 281 (32 non-canon) |
| Deaths: | 2 (non-canon) |
| Allies: | Hank, Deimos |
| Enemies: | A.A.H.W., Tricky, Auditor |
Gadget-brandishing and meathook-wielding extraction team duo, who work closely with Hank but whose loyalties are not fully known.
- Madness: Project Nexus 2 Kickstarter
Sanford serves to be one of the secondary protagonists of the Madness Combat series, mainly fighting alongside Deimos. He wears a bandana, black teashades, army-camo pants and has what appears to be a DNA-pattern tattoo on his back. He debuts with Deimos in Madness Combat 5 when they deliver a dragon sword to Hank. He later appears in Madness Combat 5.5 as one of the protagonists, and again in Madness Combat 6.5, Madness Combat 7.5, Madness Combat 9: Aggregation, Madness Combat 10: Abrogation and Madness Combat 11: Expurgation.
Personality
Sanford is shown to be serious, but be surprisingly expressive when it comes to combat, for the first few .5 episodes, he has a normal cross on his face. But in Madness Combat 6.5, his expression changes to a smug look when he tries on his glasses, as if feeling confident. Up to Madness Combat 11, Sanford had always remained calm, collected, and focused, in contrast with his partner Deimos, who is more goofy and clumsy. Upon finding out that Deimos had been killed in Madness Combat 9, Sanford does show shock and even takes a step back for a moment, before focusing his attention to the Auditor and returning to his serious demeanor. Between he and Deimos, he is the de facto leader of the two, thanks to his collected nature and sense of responsibility.
Madness Combat 11, however, is where Sanford begins to crack. Upon being faced with Demon Tricky and being thrust into Hell, Sanford attempts to maintain his focused attitude. However, this proves to be impossible as instead of prior objectives of his missions, Sanford's sole goal is to survive. In comparison to Hank, who is already majorly focused on killing his way through, Sanford is woefully unprepared for the new challenges he faces. As the episode progresses, Sanford's serious demeanor cracks and falls away as he is pushed to his very limits by Tricky, and slowly feels more hopeless and negative as he fights. He begins to act more out of emotion, at one point even angrily throwing two guns to the ground when they are useless against some of his enemies. When he is slammed into a cliff at high speed by Tricky, Sanford lets out a scream of pain and agony, and his expression goes from one of smug focus to one of terror as Tricky overwhelms him and he hides behind a riot shield for dear life. His face did revert to normal when Hank returned and distracted Tricky. After Hank and Sanford reunite, Sanford notably becomes less involved in combat, preferring to let Hank head in first and provide support, even following at a distance and looking over his shoulder warily.
Abilities
Along with his allies, Sanford is very combat-capable, being skilled in different forms of fighting. His preferred choice of weaponry involves melee weapons, a foil to the more firearm-acquainted Deimos. This is especially obvious given his signature weapon, the hook, which he used to snag enemies and pull them away, or use as an impaling tool. When equipped with firearms, Sanford seems to take more of a support role with his teammates, fitting with Deimos's battle-charge fight style, or Hank's head-on direct approach. His firearms preferences seem to lean towards guns that leave large wounds, such as shotguns, high-caliber revolvers, or even a Bren gun. His fighting style is often more tactical, wary, and strategical, contrasting with Deimos's more reckless approach or, again, Hank's direct approach. As a result, it is rare that he takes the lead, often preferring to trail behind his comrades. This also resulted in Deimos holding a higher body count than Sanford, until Sanford was able to surpass Deimos due to his death.
Sanford holds an impressive tolerance for pain. He was the first of the duo to recover from having a building dropped on their heads, was able to keep moving long enough to get to a medical cabinet after being shot in the stomach, and even managed to take a knife in the ribs and then pull it back out, treating it as a minor inconvenience. Sanford is also notably agile and quick, often moving fast, performing acrobatics while killing enemies, and dodging attacks with ease. This agility and speed combines well with his usage of melee weapons, allowing him to slice, stab, and/or beat his way swiftly through rooms of enemies . He also displays traits of being a quick thinker, able to plan his next moves on a whim. However, such abilities seem to falter in Madness Combat 11: Expurgation, where he becomes slower to react, more visibly responsive to pain, and generally less combat-capable than before, although this is likely due to the severe exhaustion Hell and Tricky have inflicted on both his physical and mental state.
While Deimos's advantage is technology, Sanford seems to be experienced in the field of medicine. When both characters were suffering bleeding head wounds, Sanford managed to bandage both of their wounds while Deimos fought off any opposition, as well as grab a bandanna to wear over his bandages to protect them from the elements. After being shot in the stomach, Sanford was not only able to bandage that wound as well, but also give himself a shot of adrenaline to keep himself moving.
Appearances
Madness Combat 5: Depredation
Sanford first appears in this episode in a convertible right before the final scene. He tosses Hank a dragon sword to help fight Tricky, and then backs up the car, only to be crushed, along with Deimos, by a building that falls from the sky. An interesting fact is that most people didn't know that these two were Sanford and Deimos until the announcement of Madness Combat 5.5.
Madness Combat 5.5
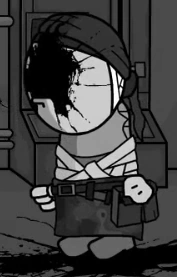
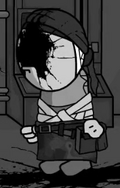
Sanford appears in Madness Combat 5.5 as a protagonist, alongside his partner Deimos. In this episode, it shows how he and Deimos have survived the crash by the Flying Party, being wounded in the head. They go to next room, where they encounter a group of 1337 agents.
While Deimos fights them, Sanford takes some bandages out of a medical kit and wraps them around his head, covering his wound. He then helps Deimos, by killing some 1337 agents before he drinks a beverage left on a table, where his lower lip is visible while he drinks. They go into another room, where Sanford, using a nightstick, and Deimos kill more agents. While Deimos continues killing his enemies, Sanford quickly grabs a bandage and puts it around Deimos' head, covering his wound as well. Sanford then picks up a KRISS Vector to kill more 1337 agents alongside Deimos, as they go forward. While Deimos picks up a shotgun, Sanford finds a locker with a black piece of cloth, which he wraps around his head as a bandana and he also picks up a Spectre M4 and uses it to kill more of the 1337 agents.
When the protagonists enter a room and kill 6 agents, cracks suddenly appear from the wall, showing the red static sky ou

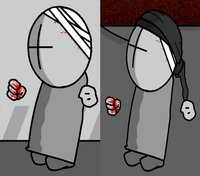
Sanford in Madness 5.5 (Left, first half, right, second half)
tside. A red beam pours into the crack, grabs dead 1337 agents and blows up their heads. Sanford and Deimos rush into the next room, where they encounter more agents and kill them. Sanford then tries to use the elevator, but it shows how it is blocked by the red statics. Then all of a sudden, the deadly clown enters the room.
Tricky first points at the protagonists, then with a superhuman speed, he rushes at them by bouncing off the ceiling and floor, knocking Deimos to the wall first. Then Sanford tries to hit him with the billy club he had kept with him, but Tricky easily grabs him, punches him a dozen times at high speed and forcefully knocks him into the wall, and stealing his billy club. Deimos then tries to attack him, but he gets punched so hard, that he goes through the wall, thus leaving a hole in it. Sanford, having seen Tricky's mighty power, raises his hands in a surrendering pose and decides to jump through the hole and run away. Tricky looks down at them disappointed and decides to leave without finishing them off.
Afterwards, a group of 1337 agents arrive and Sanford wakes up Deimos so that he gets ready to fight. They kill all the agents and suddenly, a building crashes behind Deimos, who was smoking, almost hitting and killing him. They decide to go inside the building, where they kill more 1337 agents and then train tracks start appearing from the ground and without warning, a train starts coming towards them. Deimos shoots at it, but the train passes, almost running over the protagonists. Finally, they go forward, when suddenly an A.T.P. engineer appears and fires a Colt Revolver at Sanford.
Madness Combat 6.5
Sanford and Deimos are once again the protagonists. In the beginning of Madness Combat 6.5, Sanford is shot in the stomach by the A.T.P. engineer, as seen from the previous episode. Deimos manages to kill the engineer and helps Sanford to get up. Due to his injury, Sanford is unable to fight, so Deimos covers him and kills all A.A.H.W. agents by himself as they forward. While they go, Sanford picks up a shotgun and when they arrive at a room with a ledge, Sanford sees a medical kit.
While Deimos kills some 1337 agents, Sanford bandages his torso, covering his wound and then, he injects himself with a shot of adrenaline, which revives him as he starts fighting once again. He goes down the ledge and kills all the agents that were down, using his shotgun. As the protagonists go into the next room, Sanford steals a grunt's revolver and kills him with it. He then finds a waistjacket, that he keeps throughout the rest of the series, then also finds a grenade launcher and a belt, which he doesn't keep, but gives them to Deimos. Finally, he picks up a bren gun and goes to the next room with Deimos.
As they go into the next room, the 1337 agents have slightly changed and now possess crimson shades instead of black shades. But that change doesn't affect Sanford, as he kills many agents with his newly acquired rifle. Before they go forward, Deimos shoots a grenade at a group of agents, which annihilates them. Sanford keeps using his bren gun to kill his enemies, and then, they use an elevator to go down a room.
As they kill more A.T.P. engineers and l33t agents, they see a place called 'The Rift', then suddenly, a group of A.A.H.W. reinforcements arrives in a truck, but Deimos picks up his M203 and shoots a grenade at the truck, destroying all of the combatants inside.

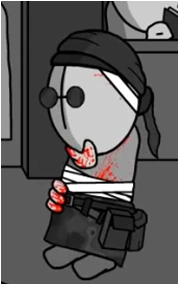
Sanford trying his signature glasses for the first time.
Deimos and Sanford get inside the Rift, they see an unarmed grunt. They point their guns at him, robbing him. Inside, Deimos gives Sanford some grey teashade glasses, which he likes and keeps them for future episodes. Afterwards, Deimos gives him a mirror, then Sanford decides to show his lower lip, looking cooler and better with his sunglasses. Deimos also picks up his trademark "TAC jacket" and a visor.
Suddenly, an explosion blows up the door and more agents start attacking them. The protagonists easily kill them and decide to climb up a ladder, arriving on the roof-top of the building. After killing many l33t agents, Sanford escapes with Deimos in a helicopter at the end of the episode, shooting his Bren and pulling out his Colt Revolver before the screen fades and the episode ends.
Madness Combat 7.5
In this animation, Sanford and Deimos infiltrate the facility where A.T.P. soldats are manufactured. In the beginning of the episode, several agents outside a building are pulled to the roof by Sanford's hook. He then drops down to join with Deimos, and takes out his TMP attached to a suppressor, ready to enter the building. Sanford kills many l33t agents as they go forwards and they take an elevator to go down a room. In the next room, they kill many agents that were holding beer, as if they were celebrating, and then Deimos encounters an MG-42, which he picks up.
In the next room, Deimos doesn't fight due to his heavy gun and Sanford does all the killing, many 1337 agents and 2 A.T.P. engineers, mostly using his hook. He then picks up a FBI-10, and goes into the next room which is a bar, where he kills only 2 agents, because Deimos does most of the kills using his MG-42. Same things happened as

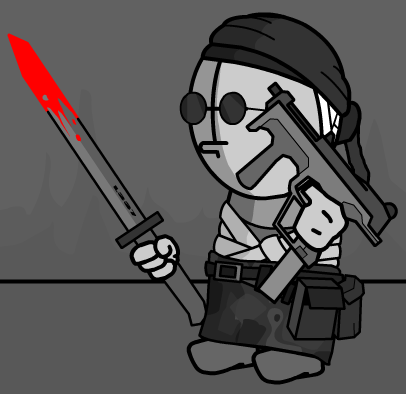
Sanford, Madness 7.5
they arrive to the next room, until Deimos runs out of ammo, where Sanford picks up a L337 sword and stabs an agent that was behind his partner. Sanford and Deimos encounter their first spike gate in the next room, which Deimos easily opens. Suddenly, a flashbang explodes, but Sanford covered his eyes (along with his glasses) at the right time and doesn't get affected. He then sees 2 A.T.P. soldats entering the room, which he easily kills with his gun. With some co-operation, the protagonists manages to go past another spike gate and go into the next room.
Sanford only uses his L337 sword and his hook to kill all the agents (including 2 A.T.P. engineers and 1 A.T.P. soldat) in the next 2 rooms and then finally arrive inside a terminal room. Sanford once again kills all the folks, with the help of Deimos, who were guarding the computers with his melee weapons. As he goes forward with Deimos, they encounter 5 A.T.P. soldats who were just getting activated by a computer and they start attacking the protagonists. Sanford easily kills 4 of them using his L337 sword and a carbon knife, he then proceeds to go observe the terminal.
The computer was ready to get auto-repaired, but then Deimos comes along and plants a bomb into the terminal. They finally decided to leave the room as the bomb explodes and destroys all the computers, supposedly stopping the production of the A.T.P. soldats. But then, Deimos receives a message on his PDA, which says: "HANK HAS BEEN TERMINATED."
Madness Combat 9: Aggregation

Sanford and Deimos receiving Hank.
Sanford and Deimos are the main protagonists of this episode. In this episode, Sanford's primary weapons are his hook and Colt Revolver. The two are driving in a car when a truck filled with A.T.P. engineers accosts them. They incapacitate the car with their heavy gunfire, but Deimos manages to kill all the engineers and escape along with Sanford onto the top of another incoming truck. Sanford uses his hook to kill the A.T.P. engineers in the back of the truck while Deimos takes over the driver's seat. The two then drive to the infamous plateau from Madness Combat 7: Consternation - where Hank's and Tricky's bodies lie. Sanford kills several agents coming out of the building before entering it with Deimos, who is carrying Hank's corpse.
Eventually, Sanford and Deimos fight their way into another building, with Sanford's chest being stabbed by a bowie knife in the process. Chased by enhanced A.T.P. engineers, Sanford and Deimos split. Sanford drops his revolver in the next room for an AS Val and later a Benelli M4. Unlike his partner, Sanford manages to survive the attack of one of the enhanced A.T.P. engineers, escaping with just a wound to the hand.
In the end, Sanford sees the dead body of Deimos and engages in brief combat with the Auditor himself before getting knocked back by a baseball bat. Sanford and Hank, alive, stand before the Auditor as he sucks in all the agents' corpses on the field, growing a bit larger and more powerful.
Madness Combat 10: Abrogation
Sanford is one of the main protagonists in this episode, battling the Auditor alongside Hank. Sadly, Sanford is unable to harm the Auditor by shooting at him and then gets knocked back. Then, Hank starts fighting the Auditor, but he gets severely wounded by The Auditor's OA-93. When The Auditor was about to finish him, Sanford re-appears from behind him, snatching away his gun with his hook and shoots him, saving Hank's life. However, The Auditor doesn't take any damage from Sanford's gun and attacks Sanford, by morphing into a Dragon head and spewing some dark fire at him. He then takes back his OA-93 and points it at Sanford, who is startled and doesn't know what to do. Hank suddenly comes from behind The Auditor, putting him in a choke hold, and steals his halo, saving Sanford. While Hank recovers and the Auditor gets his halo back, Sanford fights a group of l33t agents, plus an A.T.P. engineer. The Auditor then gets ready to shoot Hank, but Sanford throws his hook at him, making him drop his weapon and saving Hank's life once again. He then fights another group of l33t agents with an A.T.P. engineer and joins Hank. The Auditor then creates a large pillar, where an entrance then appears. Suddenly, a dark beam enhances a dead l33t agent, Sanford successfully shoots him in the head and then Hank finishes him off by ripping his head off.
Afterwards, Sanford plays a rock-paper-scissors game with Hank to decide who will go first inside the pillar through the entrance. Sanford wins and lets Hank enter first. While Hank relies on his enhanced strength to punch agents to death, Sanford continues to use various weapons, such as his hook. He kills many l33t agents, including an enhanced one once again, and some A.T.P. engineers.
After going through many agents, they encounter a Mag Agent: V4. While the mag agent fights Hank, Sanford tries to injure him by shooting him in the head, but the mag agent seems to be unaffected by the bullets. Sanford then throws his hook at him, but an A.T.P. engineer appears and cuts Sanford's hand and his hook's rope, making him lose his hook in the Mag Agent's head. Sanford then kills the engineer, while Hank killed the mag agent with two lightning/electric punches.
After the Mag agent is defeated, Hank and Sanford take an elevator to the roof, where the Auditor waits. With a Glock 20, Sanford helps Hank kill a few of the agents approaching them. However, when the Auditor arrives, he knocks down Sanford with a single punch. Sanford then backs away and spectates the fight between Hank and The Auditor. Hank takes the edge with his new electro punch, so the Auditor absorbs all the dead bodies (including the one from the end of Madness Consternation) outside the buildings. But he accidentally absorbs Tricky and then, a lighting bolt goes through the Auditor, making him glow and almost exploding. At the end, Hank grabs Sanford and climbs down the ledge, while the Auditor explodes.
Madness Combat 11: Expurgation
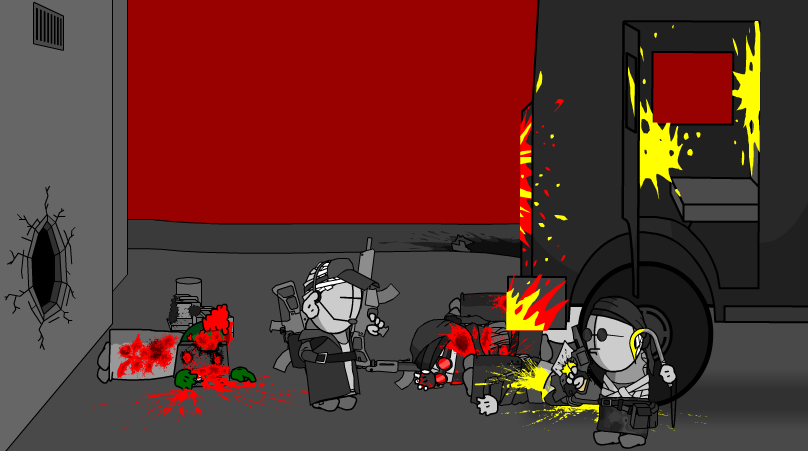
Leaving off where Madness Abrogation ended, Hank and Sanford climb off the ladder onto the ground and look up at the pillar to survey the damage. They watch as black death oozes down from the flames of what was the Auditor. The blackness pools around the base of the tower, generating skeletons, which Sanford shoots at with a Glock 20 as Hank punches the rest away. When this wave of skeletons is dispatched, Tricky reveals himself, both as a skeleton and then a skeleton demon. Demon Tricky screams Hank's name twice, the second being so deafeningly loud that Sanford covers his ears to protect them. As Hank and Tricky battle, Sanford uses the Glock to kill more skeletons, but is eventually swarmed by them and pushed down into one of the pools of darkness alongside Hank, receiving a splash of darkness to the face in the process.
In Hell, Sanford emerges from another pool of darkness to be greeted by Skeleton Tricky, who summons some agents, engineers, and soldats to fight Sanford. Sanford rips open an eye of one soldat and beats an agent to death as the newly-arrived and crippled Hank slams the rest into a wall. The two are then chased through a doorway by the Auditor's spikes, where Sanford and Hank are separated and teleported to different areas.
As the Auditor borrows Hank, Sanford is teleported to a cracked room, where the blood from his knife wound from Madness Aggregation has now also turned into blackness. Sanford grips this wound in pain, but is then involuntarily thrown back as a Micro Uzi and Browning HP suddenly throw themselves from the cut. Sanford is then confronted by more agents, but manages to successfully dispatch them. As he reaches the opposite end of the room, Tricky emerges from the ceiling, and is shot and stabbed by Sanford, causing him to shake violently. Tricky disappears into a wall, and the rest of the room flies away. The end of the room Sanford is in is tipped over, dumping him and the bodies out.
Sanford then enters a very surreal room and lands head-first into the floor, causing the other half of his body to re-emerge through a wall. Pulling himself out, Sanford is greeted and attacked by Tricky-like skeletons that enter through the floor. Dispatching them quickly with swords, Sanford is chased out by more spikes through another doorway, leading him outside to fight more Tricky skeletons. After dealing with a few, Sanford sees Tricky trying to wade through a floor, and promptly stabs him through the head, causing Tricky to float and shake as the halo also floats above Sanford. Sanford jumps to grab the halo, but it flies back on Tricky's head, who then flies mach-speed into the side of another island. Tricky, however, reemerges from a hole in the floor behind Sanford. Sanford throws his sword at Tricky, but misses, and Tricky summons some platforms and more skeletons behind Sanford, leaving him an MP5K and a trench knife. Sanford fights through the skeletons and another platform brings skeletons wielding Riot shields. After shooting the shields brings no results, Sanford angrily throws his guns down and grabs one of the riot shields, using it to bludgeon the rest of the skeletons, killing the final with a SPAS-12.
Tricky then flies up behind Sanford and taps him on the shoulder, mockingly waving to him and dodging a shotgun shell. Using a hammer, Tricky then knocks Sanford and the riot shield into the same island he slammed into earlier, summoning platforms under him. Sanford, frustrated and in great pain, lets out a scream of agony and turns to witness the island chaining itself to other islands to form a vertical path to a bar of light above. Sanford, trembling in pain, then turns to watch Tricky summon an M60 with an evil chuckle. Sanford grabs the riot shield and hides behind it for dear life as Tricky unleashes a storm of bullets at him. It is here that a path of spikes emerge from behind Tricky, with a newly-healed and possessed Hank emerging, catching the clown by surprise. Sanford watches the two battle for a bit, until Tricky kicks Hank upwards at a high speed, knocking down Sanford and losing the riot shield in the process. As the two are reunited, Tricky then uses a gravity-controlling lever to rotate gravity by 90°, and Sanford jumps out of the way of Tricky attempting to crush him with a platform. Hank and Sanford are faced with more skeletons, and Hank takes the lead, with Sanford following and killing a few on his own. Sanford picks up an MBS 95 rifle as a magnified skeleton emerges and duels with Hank, before Hank punches it into the wall of light. From here, Hank, with some new weapons, dispatches most of the skeletons as Sanford provides covering fire. Sanford picks up a knife as he watches Hank and the Mag Skeleton fight, as well as Tricky being attacked by two red spirits, until Hank punches Tricky back through the beam of light, destroying his skeletal demon form. Hank and Sanford float up from two pools of darkness next to the skeleton, either unconscious or dead. Sanford's status, along with Hank's, is left unclear.
ANAMNESIS.fla
Deimos looks through a window to see what appears to be Sanford pulling a switch on a terminal and get killed by a shotgun-wielding soldat. Deimos rushes to the room he was in and saves him from being killed again, but then Sanford turns towards him and reveals there is a black hole where his face should be. He walks menacingly towards Deimos, creating rifts in the ground where he steps, then stops and snaps to pounding holes in the wall, then to staring at Deimos as a faded image of him moves towards his body, and then is embedded in the ground.
POWERLESS.fla
Sanford's corpse from the previous short appears in the beginning of the animation.
Incident: 100A
This is the first Incident where Sanford is one of the protagonists. At first, he hides behind a hatchback and holds a fake cardboard cut-out of Deimos to distract a l33t agent, which gets killed by the real Deimos. Sanford and Deimos exchange money as part of a wager before entering the building to fight the A.A.H.W. Then, he and Deimos find a grunt being beaten up by a l33t agent. Sanford proceeds to kidnap the grunt and carries him for the rest of the Incident while Deimos covers them. They then get away by stealing a truck and go meet with Hank. Hank looks at the grunt, before telling them that the grunt they kidnapped was the wrong guy. And so, Sanford, upset and angry for their failure, returns to the truck with Deimos to go and find the right person.
Incident: 1000A
Sanford also makes an appearance in Incident: 1000A in a helicopter controlled by Deimos. He uses an M-249 to shoot at Tricky, who jumps and damages their helicopter before repeatedly hitting Sanford with the streetsign, killing him.
ROMP.FLA
Sanford is the main protagonist in ROMP.FLA, along with Deimos. They both infiltrate a building full of agents, engineers and soldats. Having easily killed two rooms full of A.A.H.W. units, their progress is halted by the mustached star, which causes them to fall through a hole it made in the ground. The duo then come across a building full of mustached characters. Once inside, the pair is alerted of betrayal, and the mustached characters close in on them. Sanford and Deimos easily clear two rooms of the mustached characters, with Sanford mainly using an iron pipe and his hook. In the final room, the mustached star summons six zombified mustached characters that end up killing both Sanford and Deimos with signs.
Madness: Project Nexus
At one point before the sidestory, Sanford and Deimos are incarcerated, relying on Hank to release them. He and Deimos are the only two playable characters for the rest of the Episode 1 Story Mode levels until the final one, in which Hank returns. In the Story Mode, Sanford has a unique weapon, the hook, which is the only melee weapon that will always return after being thrown and is impossible to discard. He is also a purchasable squadmate in Arena Mode.
Gallery
Artworks
")
")
")
")
")
")
")
")
")
")
")
")
")
")
")
")
")
")
Commissioned artworks
")
")
")
Trivia
- Sanford is one of three characters who have directly faced the Auditor in combat (along with Jesus and Mag Hank).
- Sanford appears to be the only protagonist not to have died in the canon series.
- So far, no interaction has been seen between Jesus and Sanford.
- It has never been seen how Sanford exactly obtained his hook. It was obtained some time in between Madness Combat 6.5 and Madness Combat 7.5.
- The Sun, Mag Hank, Mag Agent: V3, Demon, Sanford (in ANAMNESIS.fla), and the Auditor are the only characters without the facial cross.
- The Sun, Jesus, Sanford, Demon, Deimos (in SACRIFICE.fla, ANAMNESIS.fla, and POWERLESS.fla), and zombies are the only characters to have a visible mouth.
- In Madness Combat 11, Sanford is shown to cry in agony/frustration and appears visibly uneasy or weary. Aside from the Auditor and Jesus, this makes him the only character to canonically portray emotion via facial expression.
- Krinkels confirmed that Sanford is taller than Deimos but shorter than Hank.
- When asked if there are any plans for Sanford to become a superhuman like Hank and Deimos, Krinkels jokingly replied with: "Sanford can eat way more spicy chicken wings than both Hank and Deimos combined."
- Speaking of which, Krinkels has said that Sanford's a pretty basic guy, probably preferring sriracha or one of the oilier buffalo wing sauce, as "They're not of the mind to mess with things that work really well."
- Krinkels said on his CuriousCat page that Sanford is "probably" his favorite character due to the fact that "he hasn't died yet." Due to the date this question was answered, it serves as the only potential confirmation that Sanford survived the events of Madness Combat 11: Expurgation.
- When asked on stream if Sanford was a former A.A.H.W. member like his partner Deimos, Krinkels responded that that question is better answered by being shown rather than being told.
- As Krinkels stated that in an arm-wrestling match between Sanford and Deimos, Sanford would win easily.
- It was once asked on one of Krinkels' animation Twitch streams if all the grunts were naked as Sanford's body is the same color as a grunt's with there also being a tattoo on his back. He stated that the question was best left unanswered.
| Main characters |
Hank · Sanford · Deimos · 2BDamned | |
| A.A.H.W. units |
Grunt (Rich · Scrapeface) · Elite bodyguard · Agent · A.T.P. Engineer · A.T.P. Soldat | |
| Other characters |
Civilian (Boombox man · Dancing man · Hot dog vendor) · Demon · FellowD9 · Higher Powers · Saucy · The Sun · Mustached character · Mustached star | |
| Project Nexus characters | Main characters | Dr. Christoff · Dr. Hofnarr Phobos |
| Nexus units | G03LM · Mag Agent: N Scientist · Riot guard · Abomination · Sleepwalker patient · Mag Agent: Gestalt | |
| Arena Combat characters | Subject 1v02P 6 Krinkels · Cheshyre · The-Swain · Luis | |
| Game Modes | Story Mode · Arena Combat Mode · Zombie Arena Mode |
| Story Mode Characters |
Hank · Sanford · Deimos |
| Arena Combat Characters |
Subject 1v02P 6 |
| Nexus Units |
Grunt · Agent · Agent Mk1 · Agent Mk0 · G03LM · Mag Agent: N |
| Interactive | Lockers · Obstacle · Spike gate · Terminal |
| Other | Project Nexus · Science Tower · Weapons · Armor · Player stats · Squadmates · Gear Shop |